Below is a list of status codes that your list can contain:

These columns are tracking columns that are used for email marketing campaigns.
clickts – is the date/time that someone clicked a link
clickip – is the IP address of the person that clicked the link
viewts – is the date/time that someone viewed the message
viewip – is the IP address of the person that viewed the message.
These columns are overwritten anytime a list is used in a campaign and stores the last time a user viewed a message or clicked a link.
The active number on the "view lists" page refers to the number of email addresses that are still valid to send to on your next campaign.
The active number is any email that is not part of the inactive or suppressed email groups.
This number changes when you send out emails or if an address no longer exists the active count will go down.
Our system currently accepts either .csv (comma seperated values) files,.txt and zip files containing (.txt, .csv) files up to 70mb.
The format the list needs to be in is one email per line. Or if you have multiple columns there has to be a column called "email in order" for our system to pick it up.
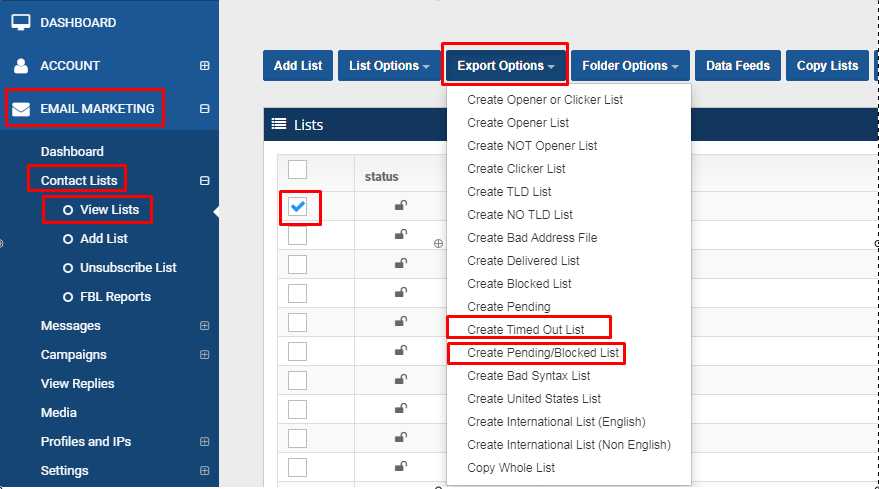
To generate/export blocked and timed out lists, just go to Email Marketing > Contact Lists > View List > check the email list of your choice > click Export Options > click Create Timed Out List or Create Pending/Blocked List

In some cases, you may experience getting some blocked and timed-out status in your campaign email list. This may depend on one factor which is your domain or IP reputation.
It is recommended to generate blocked and timed out list and resend your campaign to these lists using a different sending profile.
Watch the video tutorial below on how to add Email List.
The first step in sending your email is to add an email list to your account. Click on the ‘Add List’ link on the left-hand side under the ’email marketing’ tab.